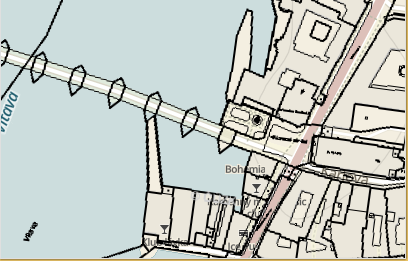
WMS overlay with MapBox-gl-js 0.5.2

alt text

Quick and dirty test of the WMS capabilities of the new MapBox-gl-js 0.5.2 API. First of all, yes ! it is possible to overlay (legacy) WMS over the vector WebGL rendered base map … however the way is not straightforward:


  • Needs some ‘hacks’ as current version of the API doesn’t have enough events to supply custom URL before it is loaded. But check latest version of mapbox, it might have better support for this.
  • Another issue is that WMS server has to provide HTTP header with Access-Control-Allow-Origin:* to avoid WebGL CORS failure when loading image (gl.texImage2D). Usually WMS servers don’t care about this, as for normal img tags CORS doesn’t apply. Here WebGL has access to raw image data so WMS provider has to explicitly agree with this.
  • Build process of mapbox-gl-js tend to be as many other large js projects complicated, slow, complex. And specifically on Windows platform it is more difficult to get mapbox-gl-js install and build running then on Mac.

Code is documented to guide you through the process, few highlights:


 // -- rutine originaly found in GlobalMercator.js, simplified
 // -- calculates spherical mercator coordinates from tile coordinates
 function tileBounds(tx, ty, zoom, tileSize) {
    function pixelsToMeters(px, py, zoom) {
     var res = (2 * Math.PI * 6378137 / 256) / Math.pow(2, zoom),
         originShift = 2 * Math.PI * 6378137 / 2,
         x = px * res - originShift,
         y = py * res - originShift;
     return [Math.abs(x), Math.abs(y)];
     };
   var min = pixelsToMeters(tx * tileSize, ty * tileSize, zoom),
         max = pixelsToMeters((tx + 1) * tileSize, (ty + 1) * tileSize, zoom);
return min.concat(max);
}

 
]

// -- save orig _loadTile function so we can call it later
 // -- there was no good pre-load event at mapbox API to get hooked and patch url
// -- we need to use undocumented _loadTile
 var origFunc = sourceObj._loadTile;
    // -- replace _loadTile with own implementation
 sourceObj._loadTile = function (id) {
    // -- we have to patch sourceObj.url, dirty !
    // -- we basically change url on the fly with correct BBOX coordinates
    // -- and leave rest on original _loadTile processing
     var origUrl =sourceObj.tiles[0]
                      .substring(0,sourceObj.tiles[0].indexOf('&BBOX'));
     var origUrl = origUrl +"&BBOX={mleft},{mbottom},{mright},{mtop}";
     sourceObj.tiles[0] = patchUrl(id, [origUrl]);
     // -- call original method
     return  origFunc.call(sourceObj, id);
 }


gist available here

demo here (Chrome): https://www.sumbera.com/gist/js/mapbox/index.html

Declarative vs. imperative mismatch

Notes from Jenkov.com : http://tutorials.jenkov.com/angularjs/critique.html about AngularJS Declarative vs Imperative. Couldn’t say this better…the art is to find right balance. Neither XAML , nor AngularJS found it yet (too declarative):

Quoted from the source:

Using declarative HTML templates with a bit of data binding injected is not a new idea. It has been tried before in JSP (JavaServer Pages). Here is an example:

<span><%=myObject.getMyProperty()%></span>

In AngularJS it would look like this:

<span>{{myObject.getMyProperty()}}</span>

The Declarative / Imperative Paradigm Mismatch

Declarative languages (such as HTML and XML) are good a modeling state such as documents, or the overall composition of a GUI. Imperative languages (such as JavaScript, Java, C etc.) are good a modeling operations. The syntaxes of both declarative and imperative languages were designed to support their specific purposes. Therefore, when you try to use a declarative language to mimic imperative mechanisms it may work for simple cases, but as the cases get more advanced the code tend to become clumsy

The same is true the other way around. Using an imperative language will often also get clumsy. Anyone who has tried writing an HTML document using JavaScript’s document.write() function, or wired up a Java Swing GUI using Java, or an SWT GUI for that matter, knows how clumsy this code can get.

…

It is easy to think that the declarative / imperative mismatch can be avoided with a programming language that is designed to handle both paradigms. But the problem goes deeper than the language syntax.

It is not the syntax of a programming language that decides if the language is declarative or imperative. It is the semantic meaning of what the language describes that decides between declarative and imperative. You could invent a more Java-like syntax to describe HTML elements. Or a more HTML-like syntax to describe Java instructions. But such syntaxes would not change the fact that one language describes state (HTML documents) and the other language describe commands (operations). Thus, a Java-like syntax for describing HTML documents would still be declarative, and a more HTML-like syntax for describing Java-operations would still be imperative.

…


JavaScript – best coding pattern

this or that ? bind or not-bind(this), prototype of prototype ? ehm..all the interesting   things, however better without them in your  code in JavaScript. There is perfect style finally – found in d3, check here: http://bost.ocks.org/mike/chart/ and used in dc.js as well , well described in the d3-cookbok book by Nick Qui Zhu sample code here similar post appeard here “javascript without this”

..it is worth to study the pattern, it will make your code beautiful, modern and readable. You will not need CoffeScript nor TypeScript nor whateverScript.  You even don’t need many other infrastructure or abstractions to get modules or classes  out of JavaScript. It is very elegant.

It is very simple:

function SimpleWidget(spec) {
  var instance = {}; //-- actual instance variable
  var description; // -- private variable

 //-- public API method
instance.foo = function () {
   return instance; //-- returns instance for chaining
 };

 //-- public API method
 instance.boo = function (d) {
   //-- getter of private variable
   if (!arguments.length) return description;

    description = d;  //-- setter of private var
    return instance; //-- returns instance for chaining
 }

 return instance; //-- returns instance for chaining
 }
 // usage
var widget = SimpleWidget({color: &amp;quot;#6495ed&amp;quot;})
            .boo(&amp;quot;argument&amp;quot;)
            .foo();


*** update 1

just came across this great presentation from JSConf.eu : http://2014.jsconf.eu/speakers/sebastian-markbage-minimal-api-surface-area-learning-patterns-instead-of-frameworks.html and this is exactly the way to think about all of the ‘abstracted stuff’ and syntax sugar or salt that is available today for JavaScript.

“It’s much easier to recover from no abstraction than the wrong abstraction.”

*** update 2

NPM and Browserify  is worth to look at, the way how the complex code is done for example in  MapBox-GL-JS . While I don’t like convoluted modules of modules and source maps with concatenated sources, the syntax and modularization is working well.

WebGL polyline tessellation with MapBox-GL-JS

update 07/2025: recovered demo here: Demo here: http://www.sumbera.com/gist/js/mapbox/path/index.html

recovered tesspathy demo here: https://www.sumbera.com/gist/js/tesspathy/tessPathyTest.html

update 09/2015 : test of tesspathy.js library here . Other sources to look:

  1.  http://mattdesl.svbtle.com/drawing-lines-is-hard
  2.  https://github.com/mattdesl/extrude-polyline
  3. https://forum.libcinder.org/topic/smooth-thick-lines-using-geometry-shader

*** original post ***

This post attempted to use pixi.js tessellation of the polyline, this time let’s look on how mapbox-gl-js can do this. In short much more better than pixi.js.

it took slightly more time to get the right routines from mapbox-gl-js and find-out where the tessellation is calculated and drawn. It is actually on two places – in LinBucket.js  and in line shader. FireFox shader editor helped a lot to simplify and extract needed calculations and bring it into the JavaScript (for simplification, note however that shader based approach is the right one as you can influence dynamically thickness of lines, while having precaluclated mesh means each time you need to change thickness of line you have to recalculate whol e mesh and update buffers )


// — module require mockups so we can use orig files unmodified
 module = {};
 reqMap = {
‘./elementgroups.js’: ‘ElementGroups’,
‘./buffer.js’ : ‘Buffer’
};
require = function (jsFile) { return eval(reqMap[jsFile]); };

<!-- all mapbox dependency for tesselation of the polyline -->
<script src="http://www.sumbera.com/gist/js/mapbox/pointGeometry.js"></script>
<script src="http://www.sumbera.com/gist/js/mapbox/buffer.js"></script>
<script src="http://www.sumbera.com/gist/js/mapbox/linevertexbuffer.js"></script>
<script src="http://www.sumbera.com/gist/js/mapbox/lineelementbuffer.js"></script>
<script src="http://www.sumbera.com/gist/js/mapbox/elementgroups.js"></script>
<script src="http://www.sumbera.com/gist/js/mapbox/linebucket.js"></script>
<script src="http://www.sumbera.com/gist/data/route.js" charset="utf-8"></script>
 // -- we don't use these buffers, override them later, just set them for addLine func
 var bucket = new LineBucket({}, {
 lineVertex: (LineVertexBuffer.prototype.defaultLength = 16, new LineVertexBuffer()),
 lineElement: (LineElementBuffer.prototype.defaultLength = 16, new LineElementBuffer())
 });

var u_linewidth = { x: 0.00015 };
// override .add to get calculated points
LineVertexBuffer.prototype.add = function (point, extrude, tx, ty, linesofar) {
    point.x = point.x + (u_linewidth.x * LineVertexBuffer.extrudeScale * extrude.x * 0.015873);
    point.y = point.y + (u_linewidth.x * LineVertexBuffer.extrudeScale * extrude.y * 0.015873);
    verts.push( point.x, point.y);
    return this.index;
};

// — pass vertexes into the addLine func that will calculate points
bucket.addLine(rawVerts,“miter”,“butt”,2,1);

prototype  code posted here

WebGL polyline tessellation with pixi.js

update 07/2025: recovered demo here: https://www.sumbera.com/gist/js/pixi/PixiTest.html

update 09/2015  : another triangulation methods (mapbox, tesspathy) mentioned here

pixi.js is a 2D open source library for gaming that includes WebGL support for primitives rendering. Why not to utilize it for polyline renderings on map ? It turned out, however, that the  tesselation of the polylines is not handled well.

most important code snippets:

<script src="Pixi.js"></script>
<script src="Point.js"></script>
<script src="WebGLGraphics.js"></script>

<!-- Data -->
<script src="route.js" charset="utf-8"></script>

<script>
var graphicsData = {
  points: verts,
  lineWidth: 0.00015,
  lineColor: 0x33FF00,
  lineAlpha: 0.8
};

var webGLData = {
  points: [],
  indices: []
};

// -- from pixi/utils
PIXI.hex2rgb = function (hex) {
  return [
    ((hex >> 16) & 0xFF) / 255,
    ((hex >> 8) & 0xFF) / 255,
    (hex & 0xFF) / 255
  ];
};

PIXI.WebGLGraphics.buildLine(graphicsData, webGLData);
</script>

I have put sample here:

OstravaRailways

Another implementaiton of polyline tessellation (seems like more functional) is in mapbox-gl-js  in LineBucket  .Mapbox-gl-js code took quite more time to get it running and debug on Windows platform,I  had to run npm install  from VS command shell and read carefully what all the npm errors are saying (e.g. Python version should be < 3). Then FireFox for some reason haven’t triggered breakpoint on LineBucket.addLine, this took another time to find out that I should debug this rather in Chrome.   See the blog here.Anyway good  experience with all the messy npm modules, their install requirements and unnecessary complexity. Also all the npm modules takes more than 200 MB, but some of them are optional in the install.

After all basic LINE draw in WebGL (without the thicknes and styling) is useful too, as on picture above you can see railways in CZ city Ostrava.


WebGL polygons fill with libtess.js

Update 7/2025 : recovered libtess demo here: https://www.sumbera.com/gist/js/libtess/libtessTest.html

recovered earcut demo here: https://www.sumbera.com/gist/js/earcut/earcutTest.html

Update 1.6.2015: geojson-vt seems to do great job in tiling and simplifying polygons. Check this post.

Update 18.1.2015: Vladimir Agafonkin fromMapBox released earcut.js – very fast and reliable triangulation library. Worth to check. Video available here:

Original post:

Brendan Kenny from Google showed  here how he made polygons using libtess.js on Google Maps, so I have tried that too with single large enough polygon on Leaflet with CZ districts.  libtess.js is port from C code . Neither plntri.js (update: see also comments for plntri v2.0 details)  nor PolyK.js were able to triangulate large set  of points as libtess.js.

Update:  I looked on poly2tri.js  too with following results:

I could run 2256 polygons (all together > 3M vertexes)  with poly2tri  16 701 ms  vs 127 834 ms (libtess), however I  had to dirty fix  other various errors from poly2tri (null triangles or “FLIP failed due to missing triangle…so some polygons were wrong..), while  libtess was fine for the  same data.

Here is  a test :  3 M vertexes with 1 M triangles have been by generated by libtess in 127s . poly2tri took 16s.  Drawing is still fine but it is ‘just enough’ for WebGL too.

key part is listed below:

tessy.gluTessNormal(0, 0, 1);
tessy.gluTessBeginPolygon(verts);

tessy.gluTessBeginContour();

data.features[0].geometry.coordinates[0].map(function (d, i) {
pixel = LatLongToPixelXY(d[1], d[0],0);
var coords = [pixel.x, pixel.y, 0];
tessy.gluTessVertex(coords, coords);
});

tessy.gluTessEndContour();
// finish polygon (and time triangulation process)
tessy.gluTessEndPolygon();


code available here: http://bl.ocks.org/sumbera/01cbd44a77b4283e6dcd

There is also EMSCRIPTEN version of the tesslib.c available on github, and I was curious whether this version would increase speed of  computation. I could run it but for large polygons (cca 120 verts of CZ boundary) I had to increase module memory to 64 MB for FireFox.  Tessellata 120T verts in  FF-30 took 21s, IE-11, Ch-36: failed  reporting out of stack memory 🙁

Getting back to version from Brendan  (no emscripten) I quickly measured same data on browsers: IE-11 21s, Ch-36: 31s,  FF-30: 27s .

Update Oct/2014: Polyline tessellation blog here

Modern data visualization on map

hxgn14 For this year HxGN14  conference  I have prepared a web app  of modern data vizualisation, I have got  inspired by great ideas from Victor Bret and his research and talks for general concept (high interactivity, visualization ) of this app.

It is exciting to see what is possible to do today inside browser and interactivity provided by various open source projects (e.g. leaflet,d3  and its plugins)  and WebGL technology .

iKatastr.cz 2014 – co je nového

Co je od letošního roku na iKatastr.cz nového:

– OpenLayers knihovna dělala problémy ve verzi 2.9 (dlaždice se uplně rozjížděly a neseděly v IE), OL byla povýšena na 2.12, protože ve verzi 2.13 je scrollování myší (zoom in/out)  špatné.

– iKatastr přešel z původního OLON formátu použivaném v MapShake na jednodušší konfiguraci, více propojenou s OL.

– tyto dvě výše uvedené modifikace byly důvodem toho, že jsem povypínal iKatastr v souřadném systému   JTSK  a UTM  – původní formát OLON tohle umožňoval, ale na druhou stranu to přineslo zbytečnou komplexnost kódu a nevím jestli to někdo vůbec používal (asi ne, nikdo neprotestoval) . Pokud by se měly tyto souřadné systémy do iKatastru vrátit, bude to dělané formou separátní stranky, tak jako “Ptačí pohled”

– “Ptačí pohled” je k dispozici při velkém zoom – objeví se odkaz , po jehož kliknutí se načte nová stránka s krásnými šikmými snímky od Seznamu (Mapy.cz) . Ne všechny mapové podklady umí hlubší zoom, takže např. u Bing map (Microsoft)  se tohle tlačítko neobjeví.

Update 30.7.2014  Ukončeno na  žádost Seznam.cz. Puvodni funkce zachycena na tomto videu.

– Bing podklady byly přidány jako náhražka Google street – jsou rychlé a nemusí se používat Google ‘wrapper’ – Bing dlaždice lze přímo legálně konzumovat. Nicméně skvělé satelitní snímky od Googlu jsou k dispozici také.

-Udělal jsem zjednodušení legendy – uživatel nemusí překlikávat do inverzního katastru, pokud má letecké snímky – automaticky se to přehodí.

– ČÚZK spustil GetFeature info službu – takže pokud se trefíte klikem na definiční bod budovy nebo parcely objeví se základní informace.

– Experimentálně byl přidán odkaz na strážce katastru vpravo nahoře – služba umožňuje hlídání změn v katastru nemovitostí.

– IE 8,9 to je samostatná kapitola, ale vše by mělo fungovat i na těchto už exotických verzích.


Nakonec  za 6 měsíců ikatastr.cz hostil : 372.000 návštěv od 174,233 uživatelů, kteří shlédli celkem 488,397 stránek, strávili tam sumárně víc než 1 rok (388 dnů) a naklikali tolik dotazů, že se to nevleze na stránku

Děkuji věrným uživatelům aplikace iKatastr.cz, kteří mi dali důvod udělat upgrade aplikace !

MapBox GL – vector map open source project

Open Source OpenGL vector map rendering called MapBox GL, introduced here.  Quick  test run on iPad Air was successful and is available here :

Quotes from the site:

“Mapbox GL is based on the same vector tile format that powers Mapbox Streets. This means that you can use our global basemap, fully or in part, as well as create your own vector tiles to interleave data from different sources. Much like in TileMill, our open source map design studio, you can create a custom map by composing the various roads, parks, water areas, buildings, and more from lines, points, and polygons, then style them flexibly.”

“We built Mapbox GL in C++11 using OpenGL ES 2.0, a subset of OpenGL that is available on mobile devices and that can also run on desktop hardware with very minor changes. We use protocol buffers via pbf.hpp to implement a lazy vector tile parser, plus we’ve implemented custom code for text display and layout.

Mapbox GL is open source under a permissive BSD license, so you can check out all of the code right now. It currently runs on iOS, OS X, and Linux.”